Friday, March 23, 2012

Yoga Bags at Yoga Studio

Sara sent photos of the yoga bags displayed at the yoga studio in Woodbridge.  Nice!


Courtney!

Spring Floral Arrangement in a Jar


We met with Leah O'Hearn of It's So Ranunculus Flower Shoppe to make spring arrangements last night.  We curled the variegated leaf (similar to a ti leaf or the leaf of a Chinese Evergreen houseplant) to insert inside the glass jar to hide the stems.  With a base of salal leaves collaring the jar, we inserted wax flowers (pink), chartreuse mums, purple statice (the shorter, fuller kind), and limoneum (light purple flower).  The focus flowers were pink Gerbera daisies and a yellow bud that looked like freesia. With a bow of raffia, we're set for spring!

The Blue and Brown Quilt Joins Together

The first four rows are sewn together.  You can see the pattern easily in the brown rectangles and bird print.  I sewed row 1 and row 2 together and then row 3 and 4. The next step was to sew the two sets of two rows together.  It is easier to sew together row 2 (already sewn to row 1) and row 3 (already sewn to row 4) as there will be less fabric to handle as the quilt goes through the machine.


Pin row 5 and 6 (already sewn together) to rows 7, 8 and 9 (sewn together).  Remember to sew flat sides together (bottom is flipped) and check the labels and pattern to avoid using that seam ripper!


Almost done! You will need to sew all around the edge of the quilt. I double back over every seam to ensure that the quilt edges stay together even with a dog or kids in the house!  Also make sure that seams that are hidden below remain separated and flat as you go over them.


Now it's time to clip every edge, including the outside edges.  Make the clips about 1/4 to 1/2 inch apart depending on the look you want. For the baby quilts with no batting, 1/4 inch works. For this quilt with medium thick batting, clipping every 1/2 inch or a little closer will be preferable.  Clip almost to the seam, but do not clip through the seam.  The special rag quilt clippers shown are invaluable.  The blades are short and sharp! Cut close to each seam for a fluffier, more upright look.

One more hint for thread clippings:  a sheet from a lint roller to collect those loose "tails" cut off.


In sewing each row, clip tails with small scissors, and put the thread tails on the lint remover sheet. When you're done, just throw the sheet away and start each sewing session with a new one.


Saturday, March 17, 2012

Rag Quilt Comes Together

I had some time this afternoon to start the blue and brown quilt for Kathy.  After sandwiching all the batting between matching rectangles of fabric, I laid out the pattern on the bed.  It's a queen mattress so nine rows cover the top.  The pattern from the book is for a baby quilt, but I make it an extra long lap throw to cover the toes of a tall, adult person!


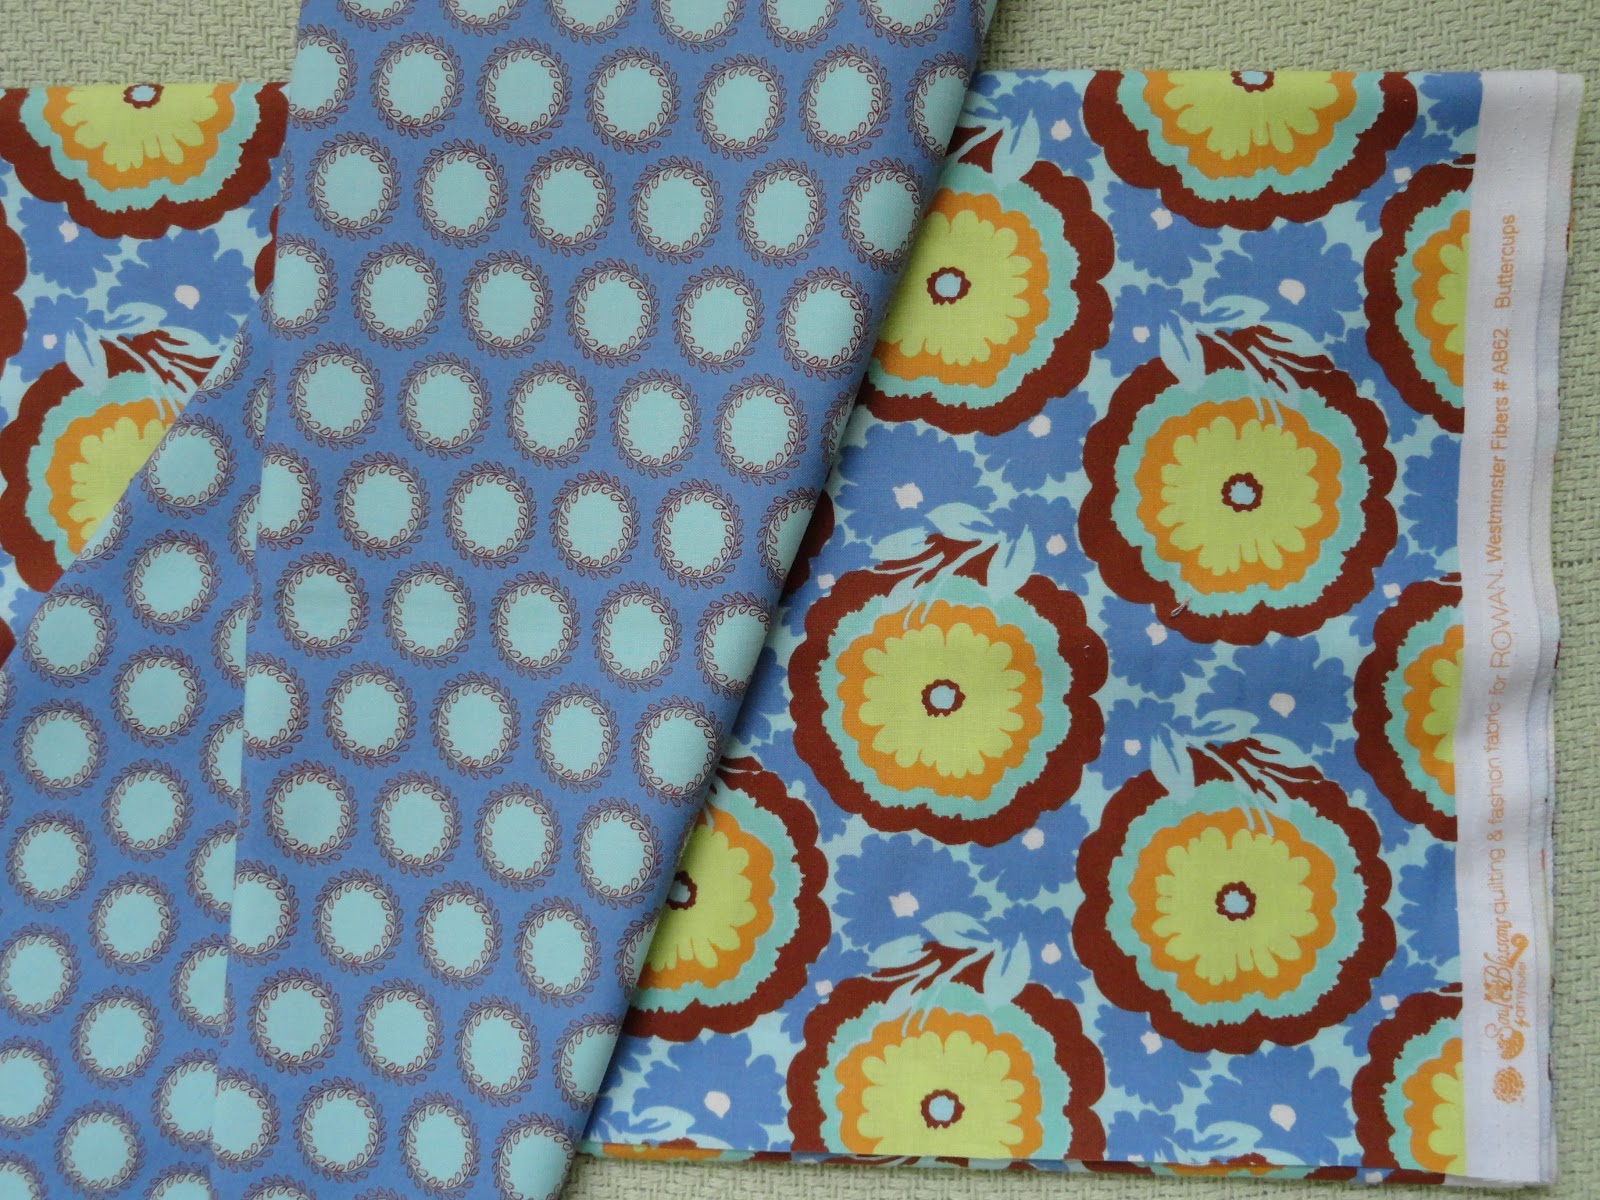
The design includes block A of three fabrics and block B of three fabrics
separated by sashes of three different fabrics.


Block A (sideways) has a blue medallion print, a solid brown and a blue swirls pattern.


Block B (sideways) has a bird print, a tie-dye aqua, and a lighter blue medallion print.


I pick up each row of the design and pile up the blocks and sashes in order (and flipped upside down) with a label separating each row. Then when I sew, I have some idea where I am in the pattern, design and progress of the quilt. I also use the labels later to identify the rows for sewing together.


Here are all the rows (now flipped over to start with row 1) in the bin and the leftovers.


My sewing space is ready to go. It's not large, just a spot in the bedroom, but it's cozy.


Block A has been sewn together with 1/2 inch seams and connected to a sash.


Block A and block B connected by a sash.


Row 1 is all done. Notice the label is now pinned to the row so I can sew them together in the right order, maintaining the pattern and design.  The pattern for row 1 is Block A, sash, Block B, sash, Block A, sash, Block B. All rectangles are 4 X 10 inches.


Row 2 is done.  Notice the pattern begins and ends with 2 sashes, then Block A,
a single sash, Block B, another sash and Block A.


Row 1 and 2 sewn together.


The reverse side (flipped, top is now on right side).

Time: 3 hours.

Seven more rows to go! About an hour per row.


Friday, March 16, 2012

Kathy's Rag Quilt

I was able to cut out the rectangles and the batting for the new rag quilt I'm making.  About 300 total!


Now for a design!

A Birthday Card for Faith

I used the bluebird card I made earlier this week and gave it a few embellishments for Faith--some blooms!  The blooms closed up the composition and gave it some overall harmony.


Inside I added a nest to nestle the check we sent her. It was made with scraps of two shades of brown crisscrossed on a half circle.  I attached it with some pop-up adhesives to create a pocket and finished it with some more "sticks" in the background.  I should have used a third, lighter brown or some raffia for more contrast, but I think she got the idea!


A Birthday Card for Ryder

My nephew's son in Denver will have a birthday this coming week. I took an old card design and made it into a slide card using an idea I saw on Pinterest. The Pinterest card was an ice cream cone that opened with the scoops and a cherry for the pull-tab. The original clown face card was made at a stamp camp with our Stampin' Up demonstrator, Laurie, about a year ago

Pull me nose!


On the original card, the clown's hat opened.  It was not roomy enough for a Cold Stone Creamery gift card, so I cut the hat along the left edge at the fold and added a bigger red triangle behind it. I used old strips of pop-up adhesive along the two diagonal edges to create space for the old hat (now white) to move in and out. I cut another circle for the clown's nose and left half untaped as a pull tab.  I used my new Tonic border punch system to make the scallop.  By trial and error and a YouTube video I figured out how to use it.  I added some fan-folded paper flowers from American Crafts Delights to disguise the larger red triangle a bit.  It'll be a great gift for a little guy's birthday!


Yoga/Exercise Mat Bags

Sara found a yoga studio instructor who wants some of my yoga mat bags made with Amy Butler designer fabrics.  I have several unsold at Anything Goes so I took a couple of those home with me.  I made a new label for them and will replace them with some made from blue fabrics to freshen up the display there.

Here are the bags for Sara to take to yoga with her.  They are made with the MidWest Modern II line of fabrics:  Garden Maze, Happy Dots, Ripple and Park Fountains.

The new vellum labels


And another combo ready to cut

but which liner should I use for this combo?

My sister-in-law gave me some drapery panels she had made from Amy Butler fabrics. I purchased some fabrics for lining. I think the Honeycomb on the left can stand up to this
large decorator fabric version of Garden Maze.  The Full Moon is too busy for the large pattern. The most fun and creative part is choosing the contrasting fabrics and colors.

Here's one ready to sew--no decisions necesary at this stage!


Saturday, March 10, 2012

St. Patrick's Day Designs for Cards

I made some cards for St. Patrick's Day last weekend using some stickers and scraps I had.  No particular inspiration for these--just scrappin' with paper on a rainy afternoon.


A peek inside...


Pull tab out

Pull tab reverse

Newest Card Designs

Last week I met with my neighbor, Bonnie, who shares my enjoyment of papercrafting. We made some cards with her bird punch from Stampin' Up using an idea we saw on Pinterest.

Card idea from Pinterest
Small bird punch from Stampin'Up

Here are the variations I made with the bird punch and some die cuts using Labels Collections Framelits dies from Stampin' Up that Bonnie had just received. We used her scrap bin and made various bird species.  Maybe you'll get one in the mail?


Goldfinch?

Bluebird?
Robin?
Love birds?


Rag Quilts from Circles for Baby Girls

Sister Linda, niece Katherine, daughter Sara and Didi

Last Saturday, Sara and I went to a baby shower for my niece, Katherine. 

Reverse side without fraying

Sara and I were happy sewers--or sewers--making the quilt together before the event.


The quilt pattern, from Frayed Edge Fun by Evelyn Sloppy, is called "Baby Blues" but uses circles instead of rectangles like "Baby Rails" from a previous posting.  The fabrics were from Fabrics.com and included Amy Butler Love Flannel Tumble Roses pink. I also used Strawberry Shortcake Garden Flannel Fun Dots White (a bright green fabric with small white dots), Camelot Flannel Songbirds Eggshell, Parfait Flannel Plaid and Butterfly Banana, Flitter Flannel Paisley Garden Pink, and Fluffy Jungle Flannel Confetti Pink/Green.  I bought an Olfa rotary circle cutter 18mm to make the cutting easier and faster than the rectangles.

I had made another baby quilt from the same pattern for Amy, my nephew's wife, with different colors.  Her quilt fabrics were from Connecting Threads Sunny Day collection and included Posy Patch cream, Garden Patches blush, Posy Patch kiwi, Freshed Pick burro, Ditty Dots burro, and Mirage peach.
Mint chocolate chip?

Reverse side without frayed edges
And, of course, each of the pregnant nieces received a baby carriage card.


Welcome, babies!